A Guide to the Evergreen Trading System
Financial Setup
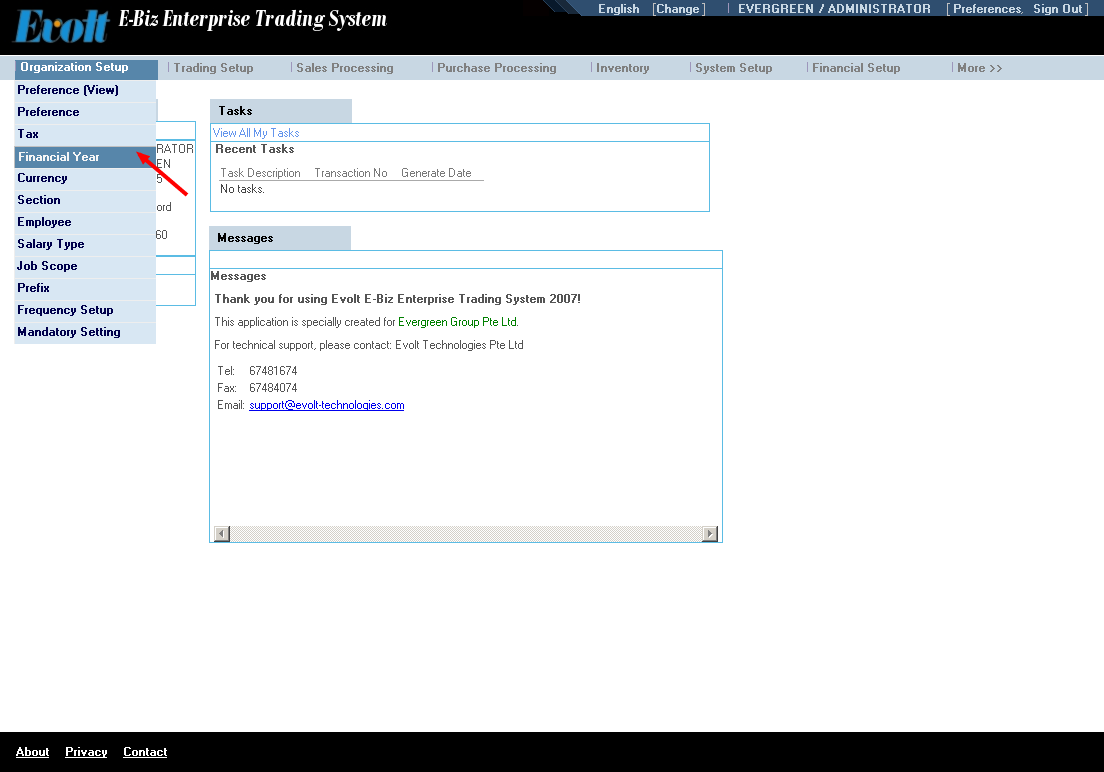
Steps to create a new financial year
-
Open the Financial Year List: Application Menu - Organization Setup - Finanical Year - Financial Year List
-
Click the Create button at the bottom of the page to open the Financial Year screen.
-
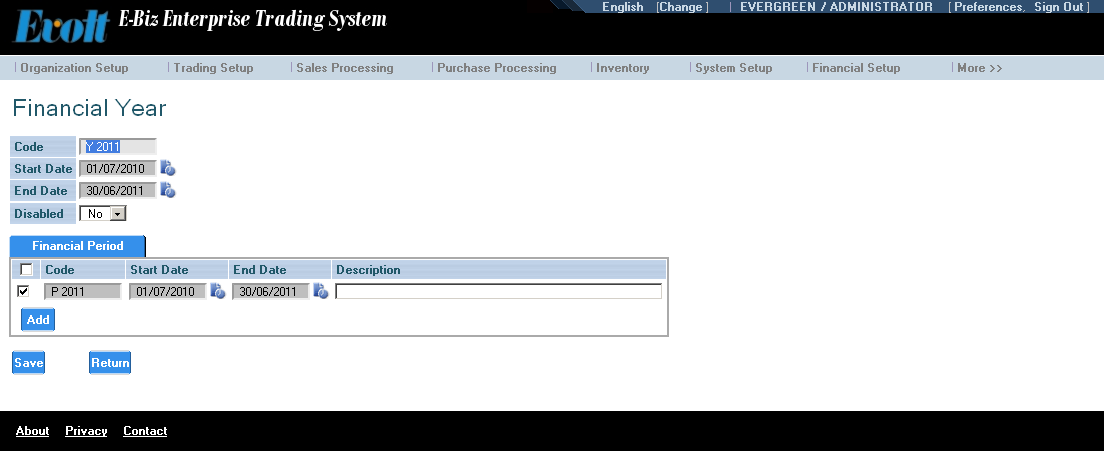
Choose a unique code for the financial year such as FY 2011
-
Set Start Date and End Date.
Set financial period as of monthly, quarterly or yearly (means one period for the whole year).
-
For each financial period, choose a unique code such P01 or Jan. Set Start Date and End Date for the period.
-
Period should be set in sequence. The Start Date of the first period should match Start Date of the year, while the End Date of the last period should match End Date of the year.
-
Click Save.
Steps to modify an existing finanical year
-
Open the Financial Year List: Application Menu - Organization Setup - Finanical Year - Financial Year List
-
Locate the year you want to modify and click the Edit link at the right side to open the Finanical Year screen.
-
Make your modification and click Save to save the changes.
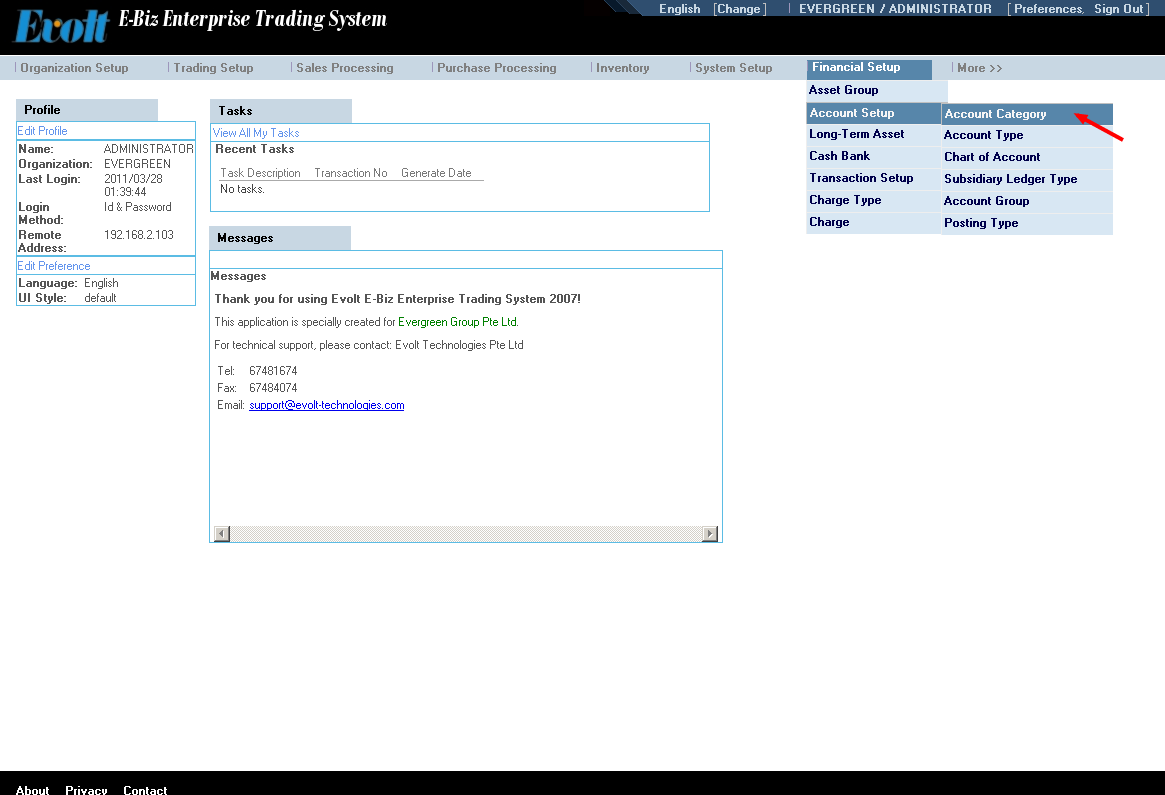
Steps to view account category
-
Open the Account Category List: Application Menu - Financial Setup - Account Setup - Account Category - Account Category List
-
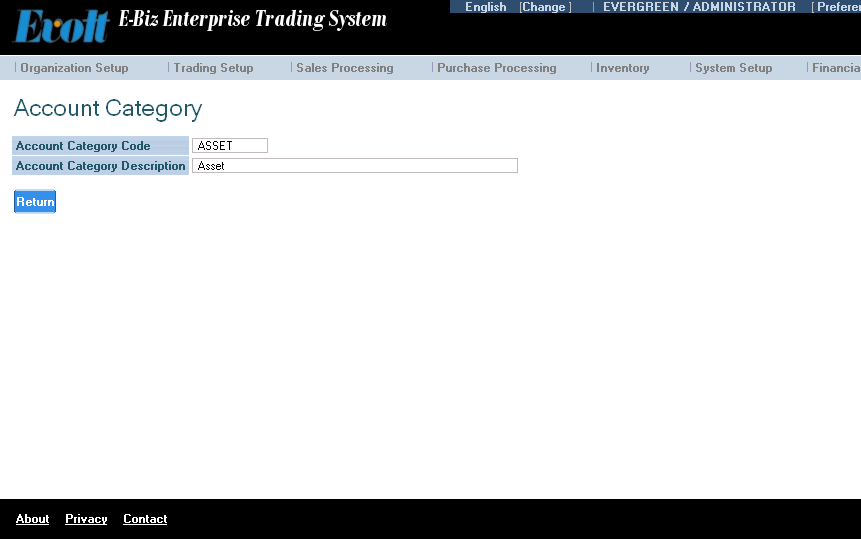
Click View next to the record to open the Account Category screen.
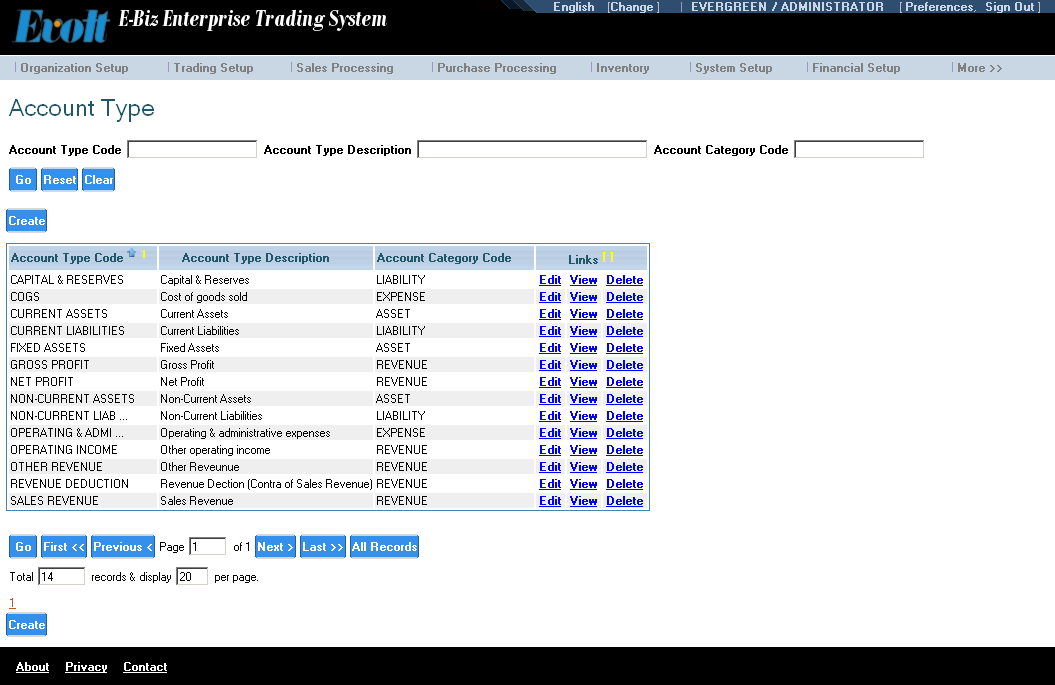
Steps to create new account type
-
Open the Account Type List: Application Menu - Financial Setup - Account Setup - Account Type - Account Type List
-
Click the Create at the bottom of the page to open the Account Type screen.
-
Fill in account code (mandatory, must be unique), description, and account category..
-
Set report sequence in four digits (e.g, 1200).
-
Click Save
Steps to modify account type
-
Open the Account Type List: Application Menu - Financial Setup - Account Setup - Account Type - Account Type List
-
Locate the record you want to modify and click the Edit link at the right side to open the Account Type screen.
-
Make necessary changes and click Save.
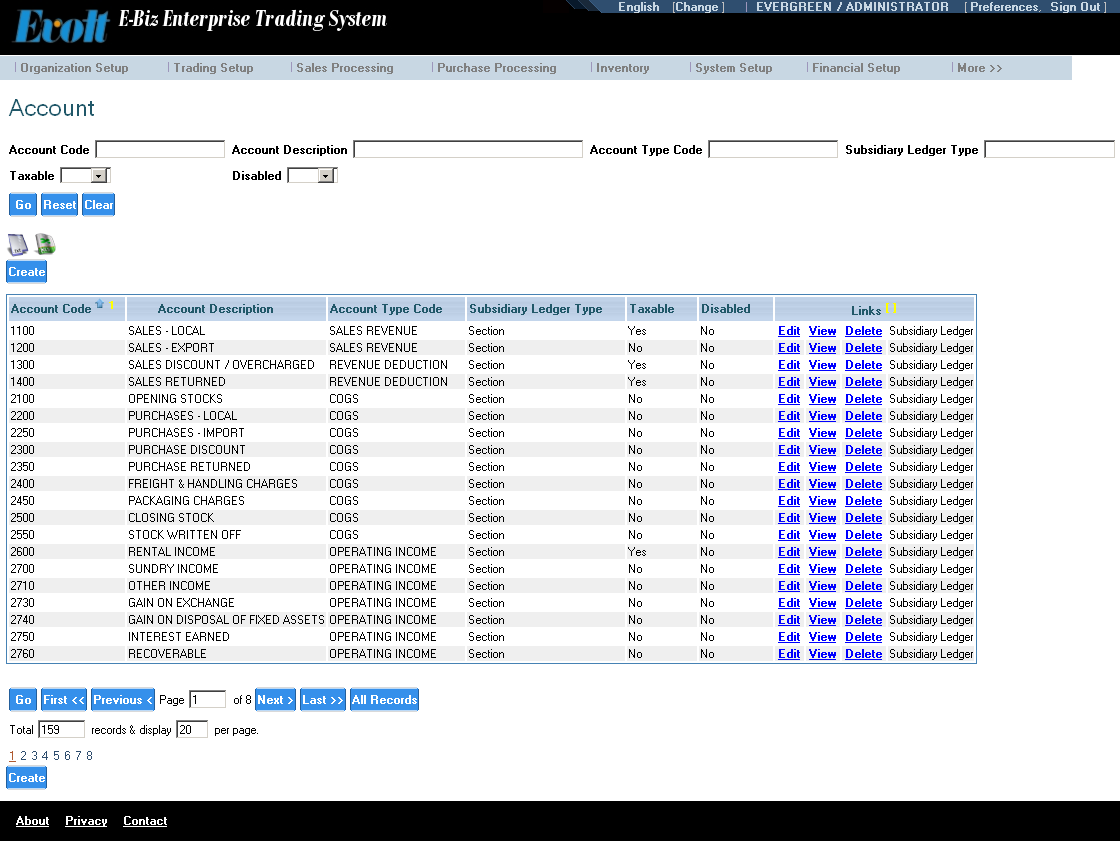
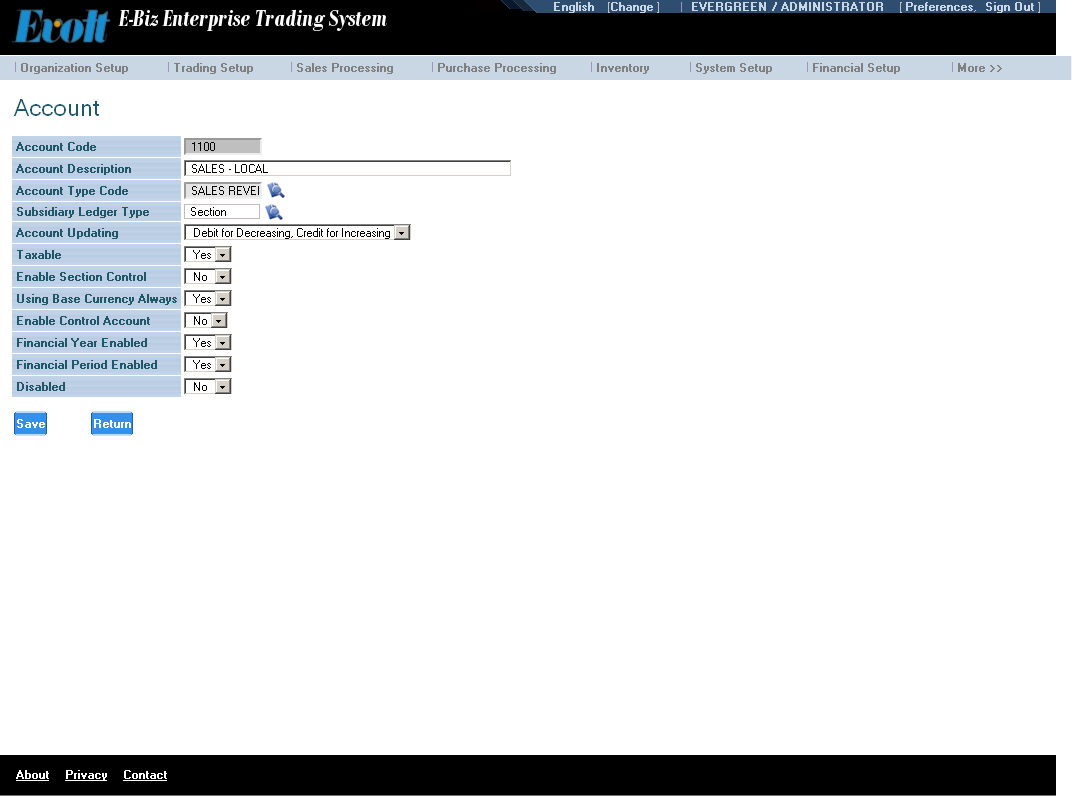
Steps to create new account
-
Open the Account Type List: Application Menu - Financial Setup - Account Setup - Chart of Account - Chart of Account List
-
Click Create at the bottom of the page to open the Account screen.
-
Fill in account code (must be uique) and description.
- Select Account Type Code.
- Select Subsidiary Ledger Type.
-
Select Account Updating from drop down list.
- Select Taxable to Yes.
- Select Enable Section Contorl to Yes or No.
- Select Using Base Currency Always to Yes.
- Select Enable Control Account to No.
- Select Financial Year Enabled to Yes.
- Select Financial Period Enabled to Yes.
- Select Disabled to No.
- Click Save.
Steps to modify account
-
Open the Account Type List: Application Menu - Financial Setup - Account Setup - Chart of Account - Chart of Account List
-
Locate the record you want to modify and click Edit at the right side to open the Account screen.
-
Make necessary changes and click Save.
Steps to delete account
-
Open the Account Type List: Application Menu - Financial Setup - Account Setup - Chart of Account - Chart of Account List
-
Locate the record you want to delete and click Delete next to it.
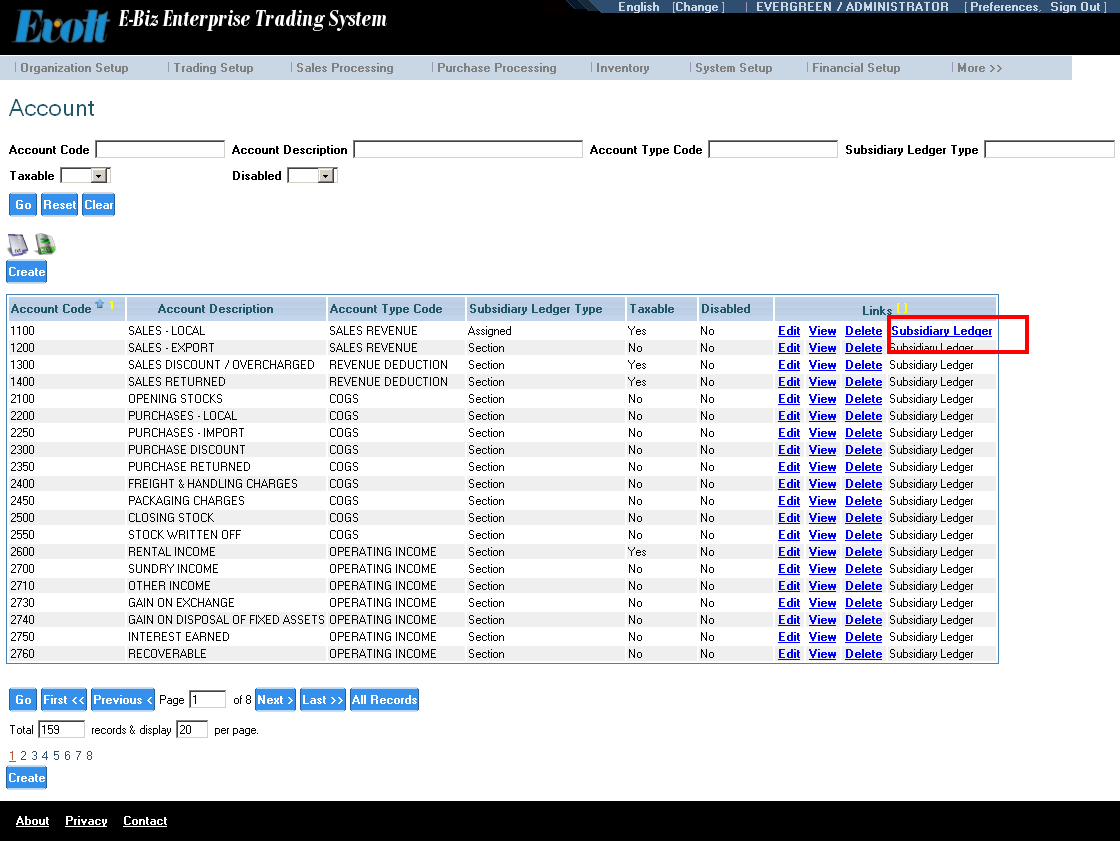
Steps to enable subsidiary ledger for account
-
Open account screen, set subsidiary ledger type to one of the following vlaues. 1. Assigned 2. Partner 3. Product 4. Section. Click Save.
-
If subsidiary ledger type is set to Assigned, the link next to the record the record Subsidiary Ledger will be activated.
-
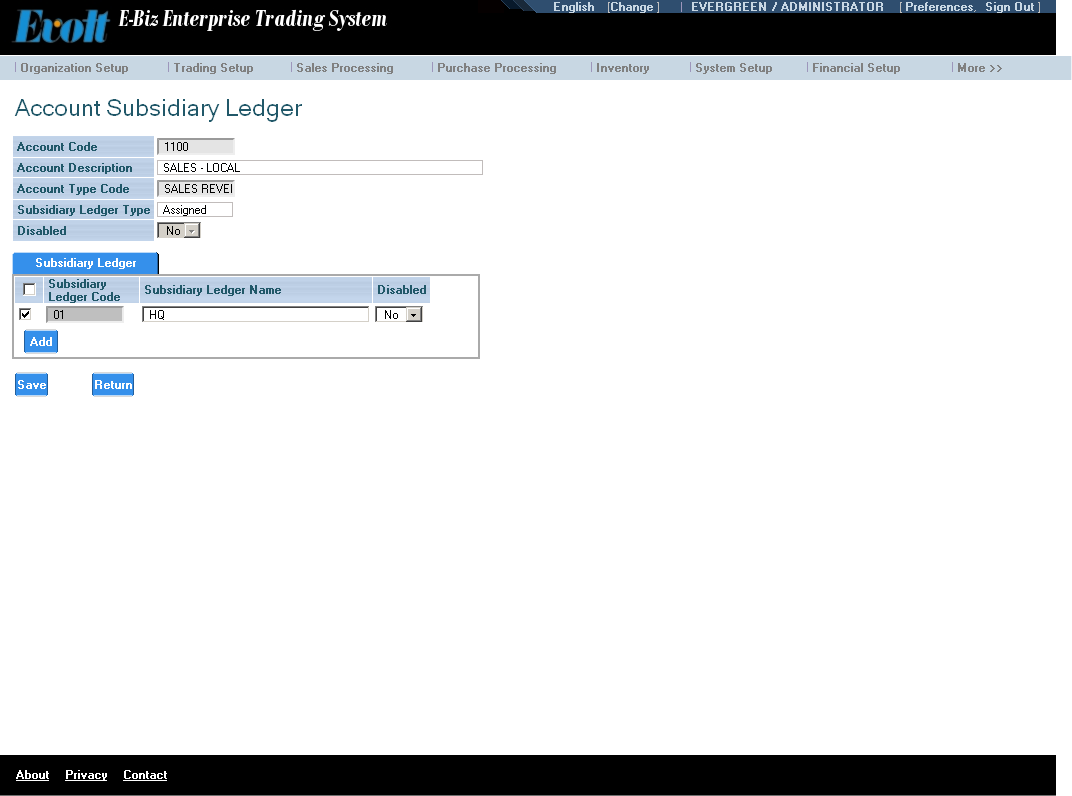
Click the link Subsidiary Ledger to open the Account Subsidiary Ledger screen.
-
Add new subsidiary ledger code or modify existing subsidiary ledger code. Click Save.
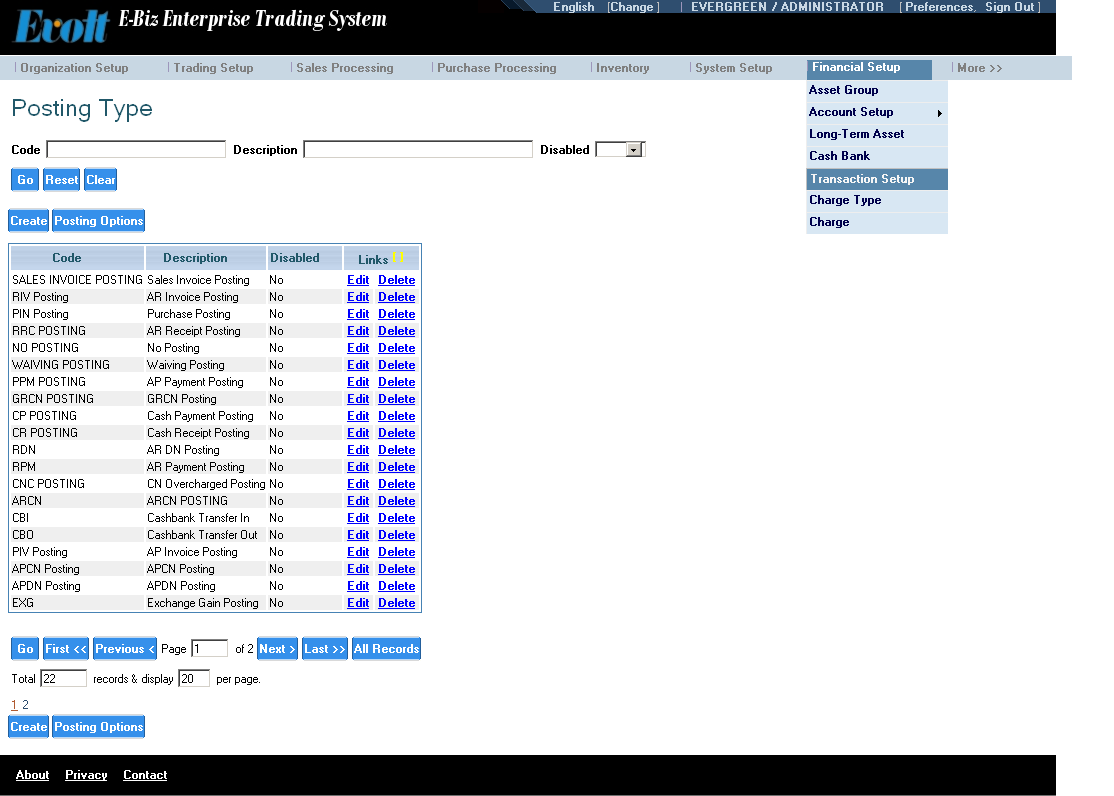
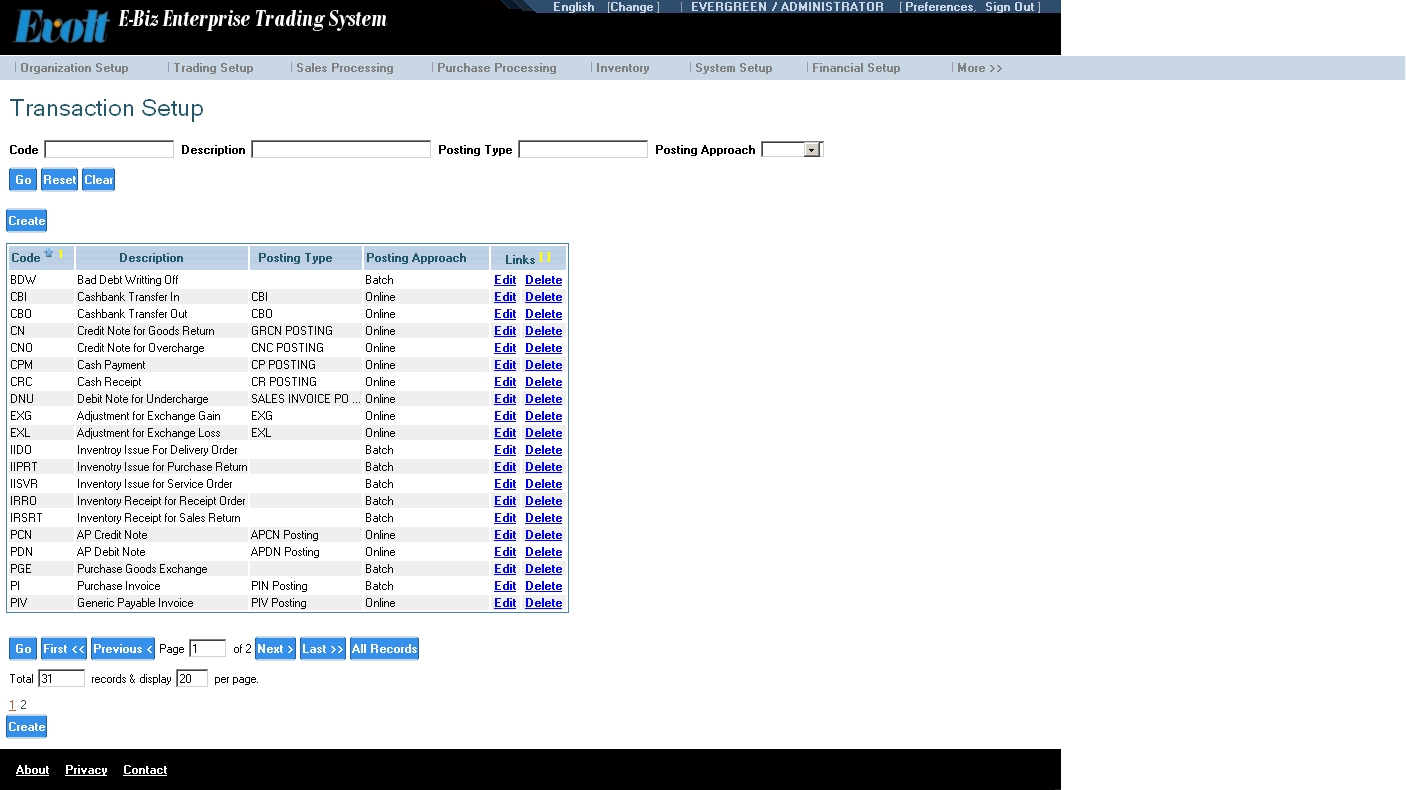
Steps to define posting template
-
Open the Posting Type List: Application Menu - Financial Setup - Account Setup - Posting Type - Posting Type List
-
Click Add to add new posting template or click Edit to modify existing template.
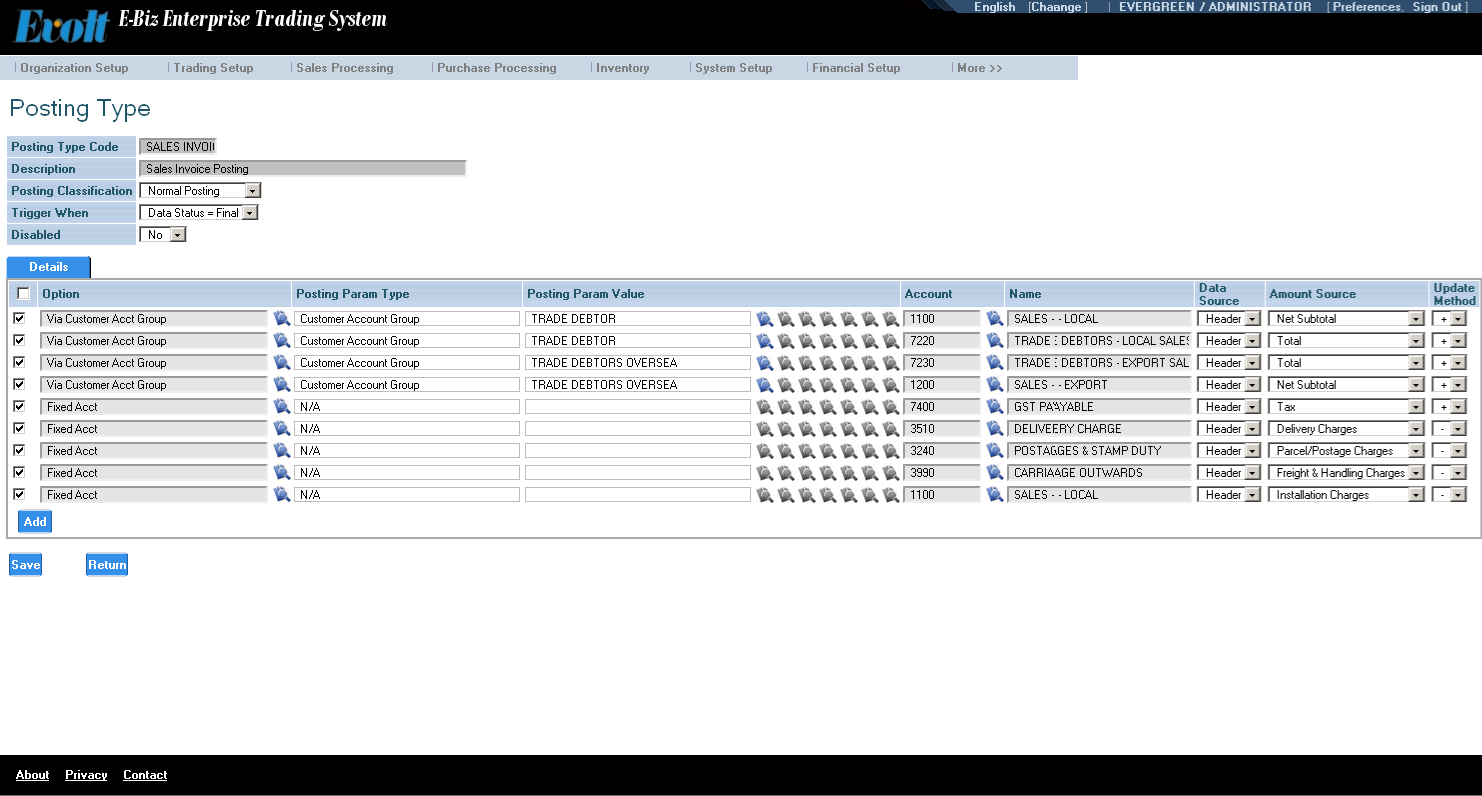
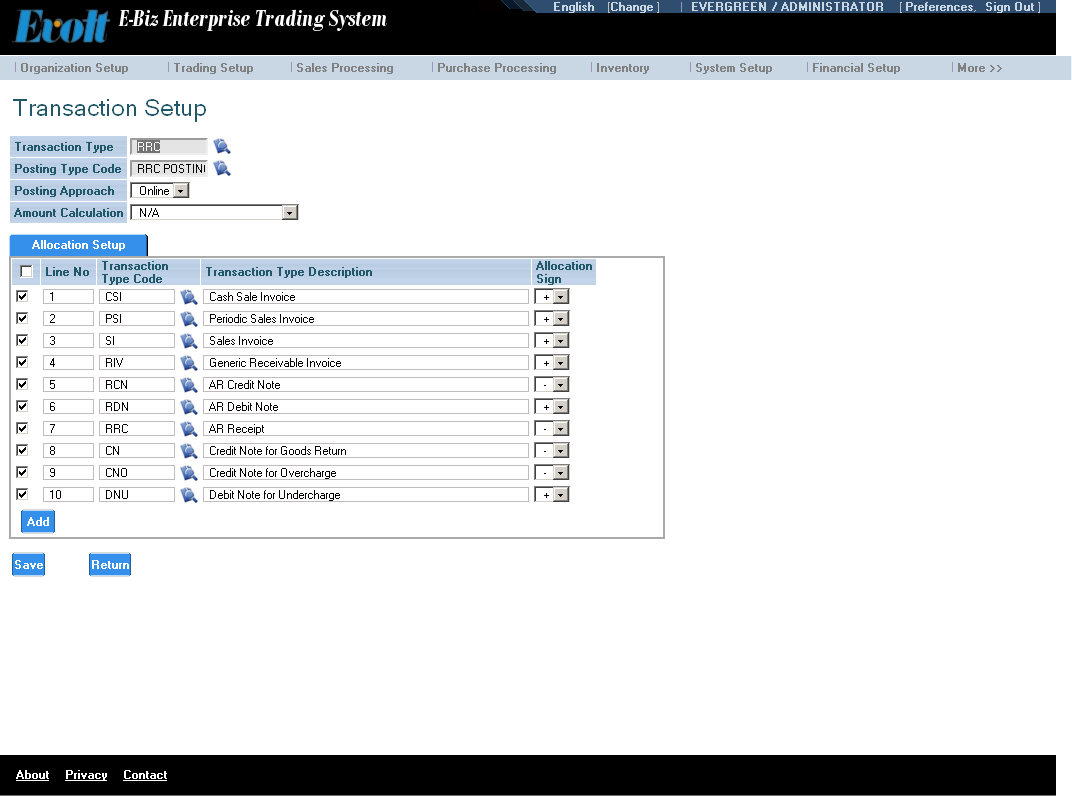
Posting Type Screen
- Set Posting Classification to Normal Posting.
- Set Trigger When to Data Status = Final.
-
You can modify existing line or click Add to add a new empty line.
-
Select posting option using the posting option pop up list.
-
Select Parameter Value from one of the activated pop up list. If Customer account group, Vendor account group, or Product account group
is selected as parameter type, the account group pop up list is activated. Select one value form the list.
If Currency is selected as parameter type, the currency pop up list is activated. Select one currency from the list.
Do the similar step for other posting parameter types.
-
Select Account.